Elevating Home-Produced Recordings with Voca and Sonnox Plugins
The Unique Challenge for Independent Artists
It is no secret that being an audio engineer and being an artist are two vastly different worlds. While engineers often revel in using hundreds of plugins and hardware units to process a simple sound, artists tend to focus more on the musical performance and the composition itself. Of course, there's nothing wrong with either approach and combining these two worlds is often the recipe for musical magic. However, reality is not always so rosy, and independent artists, especially singer-songwriters, often have to juggle all of these tasks on their own – from composition to performance, recording, mixing, and mastering. Putting it all on one person is a recipe for failure – too much pressure, too much knowledge to absorb and much less fun.
But what if we could turn some tedious mixing tasks into a joyful, performance-like process?
Today, you’ll learn how to elevate your home-produced vocal and guitar recordings into something inspiring and beautiful sounding. We'll delve into the new vocal plugin, Voca, and some other complementary Sonnox plugins that will enhance the resulting sound even more. As an example, we'll use the song "So Lovely" by the Australian artist Erin Devenish.

Setting the Stage: Pre-Processing Essentials
Before we dive in, take a moment to listen to the original, unprocessed track.
Original, Unprocessed Recording
Before we work on the vocals, let's fix the guitar tone. If we don't, its flaws could distract us and make us over-processing or under-processing the vocals. When mixing music, I prefer to tackle audio problems in descending order, from the most annoying to the least noticeable in the final mix. Because we hear a lot of guitar spills from the vocal mic, we must ensure that any issues we hear aren't coming from the guitar mic itself.
Achieving a Balanced Guitar Tone: Phase and Equalization
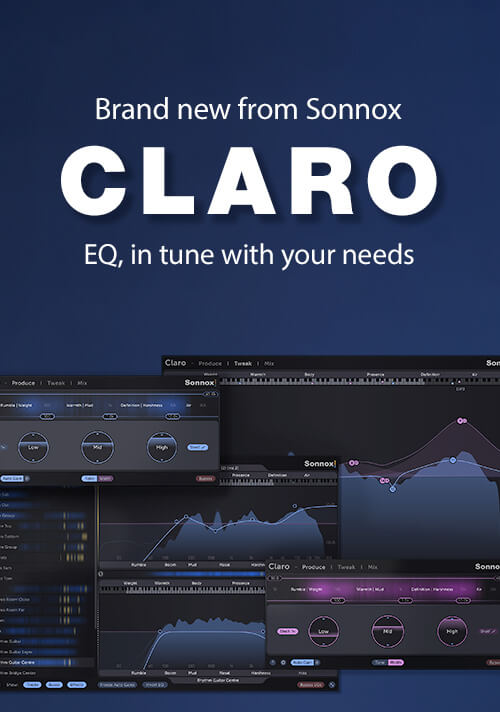
First, I checked the phase between the vocal and guitar mics to achieve a balanced guitar tone by flipping the polarity switch on one of them. Once I was confident everything was in order, I applied some equalization with Claro – I rolled off unnecessary low frequencies and cut the honky low-mid frequencies in the 'mud' area. This not only helped me to hear the useful guitar tone a little better, but it also revealed an unstable area around 500 Hz. I tackled this issue with the Oxford Dynamic EQ. Of course, we could have used Claro, but since it's not always very prominent in the sound, I thought it would be better to address the problem when it was present.
To recap:
- Check the phase.
- Roll off low frequencies.
- Apply tonal shaping and static remedial EQ with Claro.
- Use Oxford Dynamic EQ for dynamic problem frequencies.
After the EQs, I applied a bit of Oxford Dynamics – nothing fancy, just 2-6 dB of relatively slow compression, followed by the Warmth function to help the guitar sound denser. We could start discussing what Attack and Release settings to use, how to hear compression, what compression does, etc. However, for the sake of avoiding boredom or confusion, let's make it simple:
- Listen to the guitar chirp and start moving the Attack knob from the highest millisecond value down to the lowest, and as soon as you hear the chirp turn into a mumble – go back a little, and you've got your setting.
- The same idea can be applied to the Release knob: start with the slowest setting and go down to the fastest, and as soon as your head starts to bob – you have your setting. Whether you favour a slow bob, like in our case, or a fast bob – it's your preference. There are no wrong answers in music production!
Now, listen closely to how the guitar's tone changes before and after we've worked our magic on it.
Before
After
You can hear that the guitar sound is now much more stable and less resonant. You could even say that it's a bit dull and over-compressed, but let's not forget that the main sound we're going to get from the vocal and the guitar mic is a mere bolster for the pillow, and we want to have a solid support from it instead of a shaggy foundation.
Mastering Vocal Processing with Voca
Now that the guitar is under control, we can move on to the vocal track. Given the guitar spill, keep in mind that any processing we do on the vocal will affect the guitar to some extent. Therefore, we must ensure that everything we do complements both audio sources.
Starting with EQ
I usually start the processing with EQ, and while we can get spectral correction from Voca, I prefer to fix the most nagging frequency issues with Claro first. So, I rolled off the low frequencies up to 70 Hz, attenuated overemphasized frequencies around 600 Hz and 2 kHz, and then added Oxford Dynamic EQ around 450 Hz, similar to the guitar processing. As you can see, there is not much difference in the treatment of a different audio source; the only real difference is in certain frequencies. If you hear nasty frequencies and see strong peaks on the advanced frequency analysers in Claro and Oxford Dynamic EQ, the audible and visual cues will inform you what to do.
Pay attention to the vocals as we compare them before and after applying the EQ settings.
Before
After
Diving Deep into Voca
All the preparations are now complete, and we can dive deep into Voca. If you read the user manual, you know this plugin is not a one-trick pony – quite the opposite. It's a comprehensive but easy-to-use solution to lift your vocals from sounding good to great.
Voca offers a range of features to elevate your vocal recordings:
- Auto-Input Level for easy volume management
- Two-stage Compression for nuanced control
- Versatile Saturation for added warmth
- Soften module to suppress harshness and sibilance
If you have high-quality source material, it could be the only plugin you'll ever need to polish your vocal recordings. We'll try each of these functions, and you'll hear how they can transform the vocal recording. It's important to note that we'll be working with the vocal while listening to the guitar track, as it's usually easier to make processing decisions in the context of the mix.
How to Effortlessly Automate Vocal Levels with Auto-Input
Let's start with the Auto-Input Level. This module helps us solve one of the most time-consuming problems when mixing vocals – clip-gain and volume fader automation. For vocals with relatively stable dynamics, you can click the Auto button and forget about the nightmare of automation. No more hours of tweaking and wrestling with levels, which is really a blessing.
Check out the image below to grasp how the Auto-Input Level simplifies volume adjustments.
For those with a very dynamic voice, like in Erin's recording, we want to preserve the dynamics as much as possible, so we're going to use an Input Volume Auto Target automation line. It's almost the same as clicking the Optimise button in various parts of the song, but the process is fully controllable, and we can choose the levels with the utmost precision. But how does that differ from the volume fader automation? It's pretty simple: instead of writing exact volume values at any given point on the timeline, we draw the target level we want the Auto-Input Level to move the vocal level towards. So, we don't need to draw an extremely detailed automation curve – it's enough to draw a big picture of general-level changes.
Harnessing the Power of Compression
It is important to note that we have two compressors at our disposal – fast (move Squish right) and slow (move Squish left). As a reference, they work similarly to a classic 1176 into LA-2A serial compression chain, but we've got much more going on under the hood. In some settings, it feels like a Tube-Tech CL-1B; in others, an Elysia Alpha Compressor and, in conjunction with the Saturation module, the Federal AM-864. In this respect, Voca is a real chameleon, and we can get pretty much any kind of compression out of it.
Before we start listening to all the tones available, I'd like to point out a few things:
- Don't overthink the interaction between compressors.
- Use Stabilise to adjust the compression amount until the vocal sits with the guitar.
- Adjust Squish to modify consonants and the movement of the vocal.
Voca simplifies the Compression user experience so that we don't have separate parameters for Attack, Release, Ratio and Threshold, and we can focus on listening and fine-tuning the sound by moving the node around the matrix without any distractions – that's all we need to do. If we like extreme settings, so be it, and if we feel that mild compression works best in a particular situation, then that's the way to go.
Unlocking Vocal Texture with Saturation
You may have noticed that the sound isn't gritty or edgy, even at maximum Compression. This is rare. Most hardware compressors and their software counterparts can produce noticeable distortion permanently engrained in the sound. This can be a desirable effect. But, with Voca, we can turn on the Saturation module and get exactly that if we want. And what makes Voca special is the ability to add that saturation completely independently of compression. We can also choose whether we want the sound to be 'in your face' or dimmed by using positive or negative Focus values.
It's incredible how quickly we can pull the vocal into the foreground of the mix or push it into the background using the Focus parameter. It's a very useful feature that helps separate vocals from other signals in the mix in seconds. It can also help to soften the sound if the vocal is too front-focused and obtrusive.
Smoothing Vocals with the Soften Module
But what if we want to make them more pleasant to listen to without pushing the vocals back in the mix? This is where the Soften module comes in. Soften analyses the signal and automatically attenuates harsh mid-range frequencies and piercing sibilance, providing a smoother vocal texture.
The Final Touch: Reverb and Mastering
You might notice that the vocal now sounds a bit thinner than before. Our EQs and Voca worked so well that the recording sounded more like a high-quality, super-dry studio than a home-produced song. Of course, the vibe is different now, and if that's a problem, it's straightforward to fix. All we need to do is add a touch of room reverb to both the vocal and guitar tracks – Oxford Reverb with a Medium Room preset and appropriate EQ settings should suffice. And let's not forget to add a true peak limiter plugin in the form of Oxford Limiter with the Gentle Master preset to the master bus to get the song release ready.
Lastly, listen for how a touch of reverb and mastering ties the entire track together.
Before
After
Conclusion: The Voca Miracle
In this article, I've tried to cover the simplest way to get the most out of your singer-songwriter recordings. As you've seen, combining Voca on the vocal with some other handy plugins from the Sonnox portfolio was important. Would I say Voca is the only plugin you'll ever need to create great-sounding vocals? No, but nor do I expect it to be. Would it have been possible to achieve such a beautiful result so quickly without Voca? Definitely not. Its versatile compression and saturation, combined with Auto-Input Level and the ability to soften harsh frequencies in a few clicks, is a miracle. I'm very happy to have this miracle in my toolbox. I hope you'll find it useful too.
You've seen the transformative power of Voca and other Sonnox plugins. Now it's your turn to experience it with a free 15-day demo.
Thank you very much for your time!
About the Author:
Oleg "Yorshoff" Yershov is a sound engineer, teacher, and video blogger from Ukraine, as well as the founder of the YORSHOFF MIX project. Oleg's professional interests cover a wide range of sound-related topics – from recording, mixing, and mastering music and audio post-production to software development and creating thematic educational materials such as articles, books, manuals, and videos.


